Configure Microsoft Entra ID (Azure Active Directory)
Users can authenticate to Dovetail using Azure Active Directory SSO.
This article will assist you with generating required values from Azure and how to add these values to Dovetail, along with some general troubleshooting steps.
Create an application in Azure
Sign in to your Azure Portal.
Please note
If you have access to more than one tenant, select the tenant you want to use for Dovetail SSO in the top-right corner.
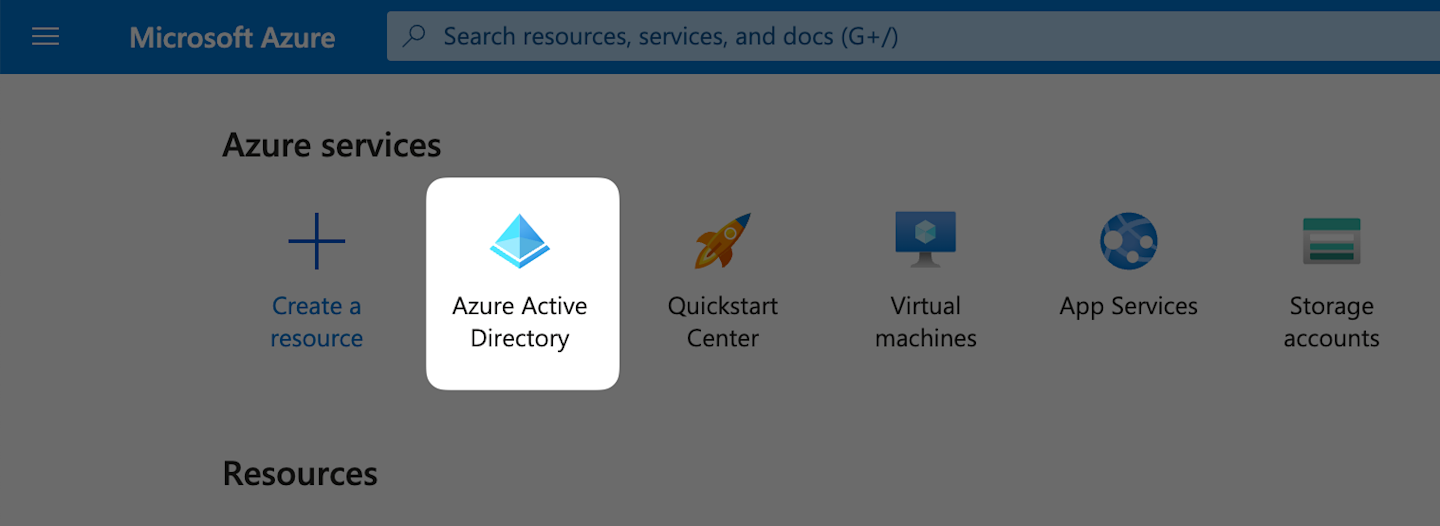
Select Azure Active Directory.
![]()
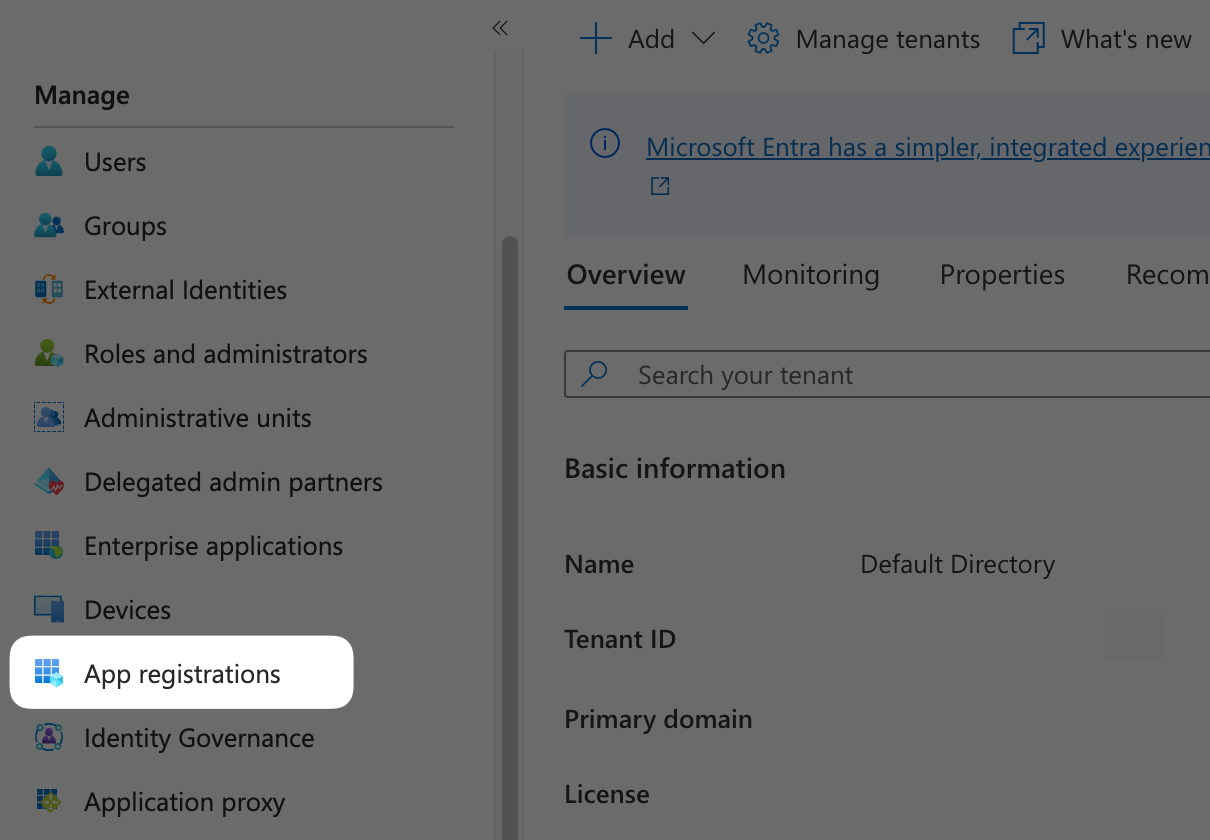
Under Manage, click App registrations.
![]()
Click New registration.
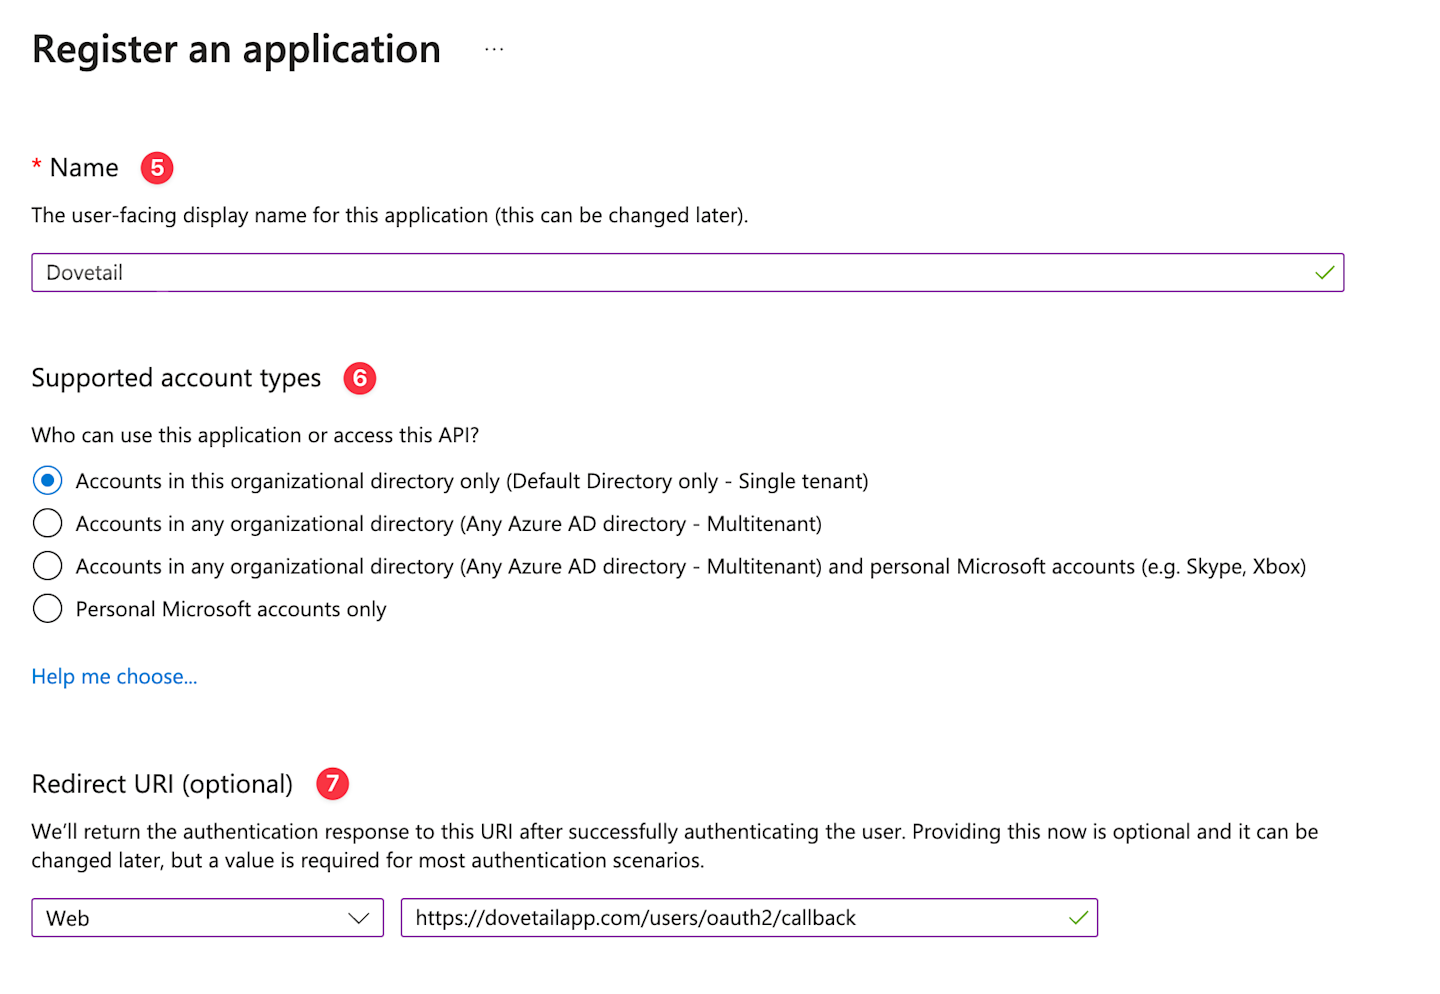
Enter an application name to display to users.
Under Supported account types select Accounts in this organizational directory only.
Under Redirect URL select Web and enter
https://dovetailapp.com/users/oauth2/callback.![]()
Click Register.
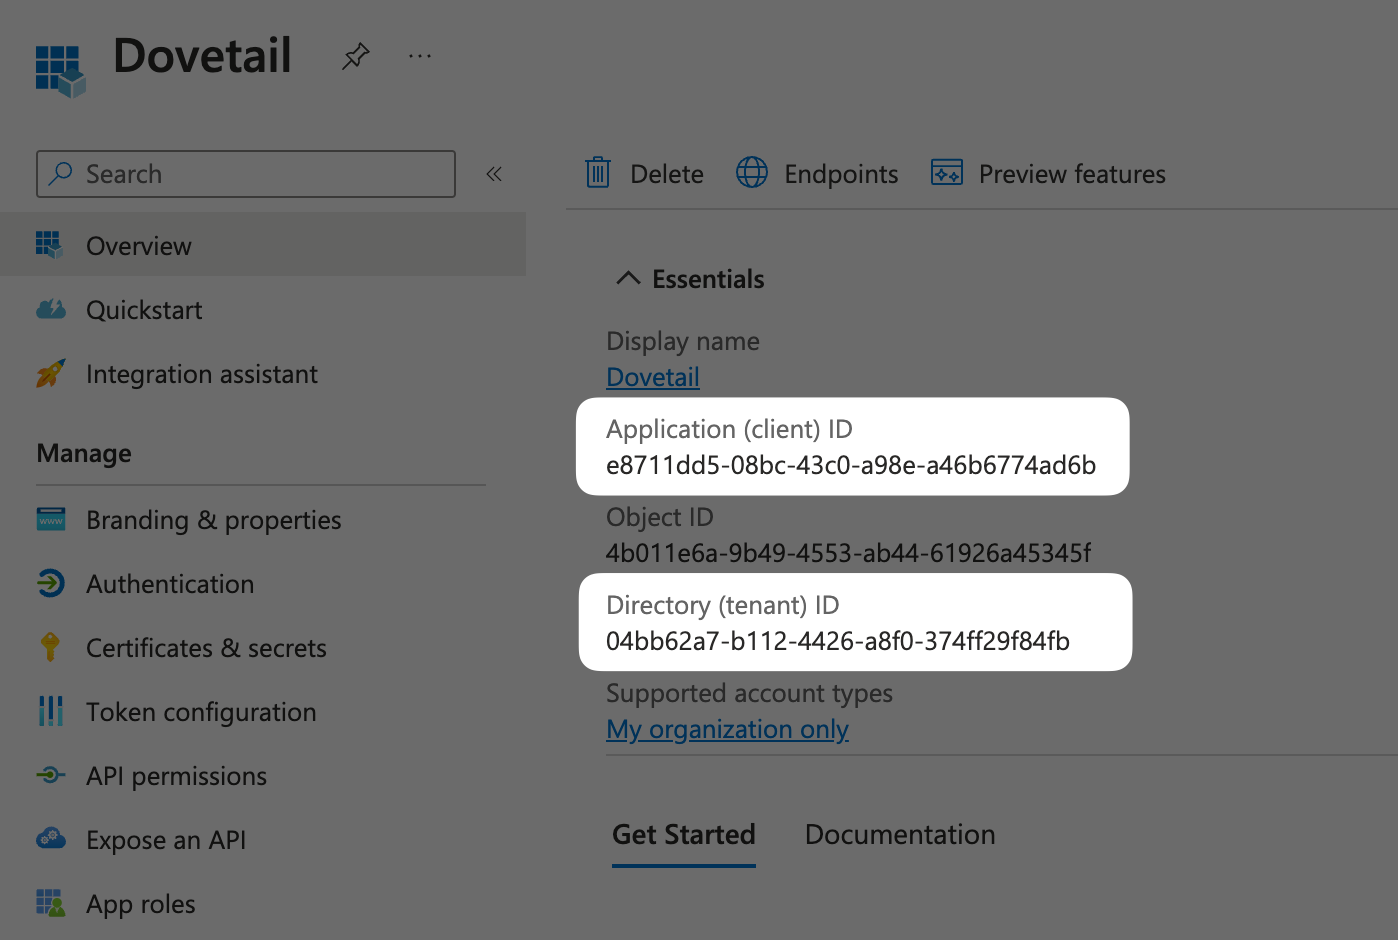
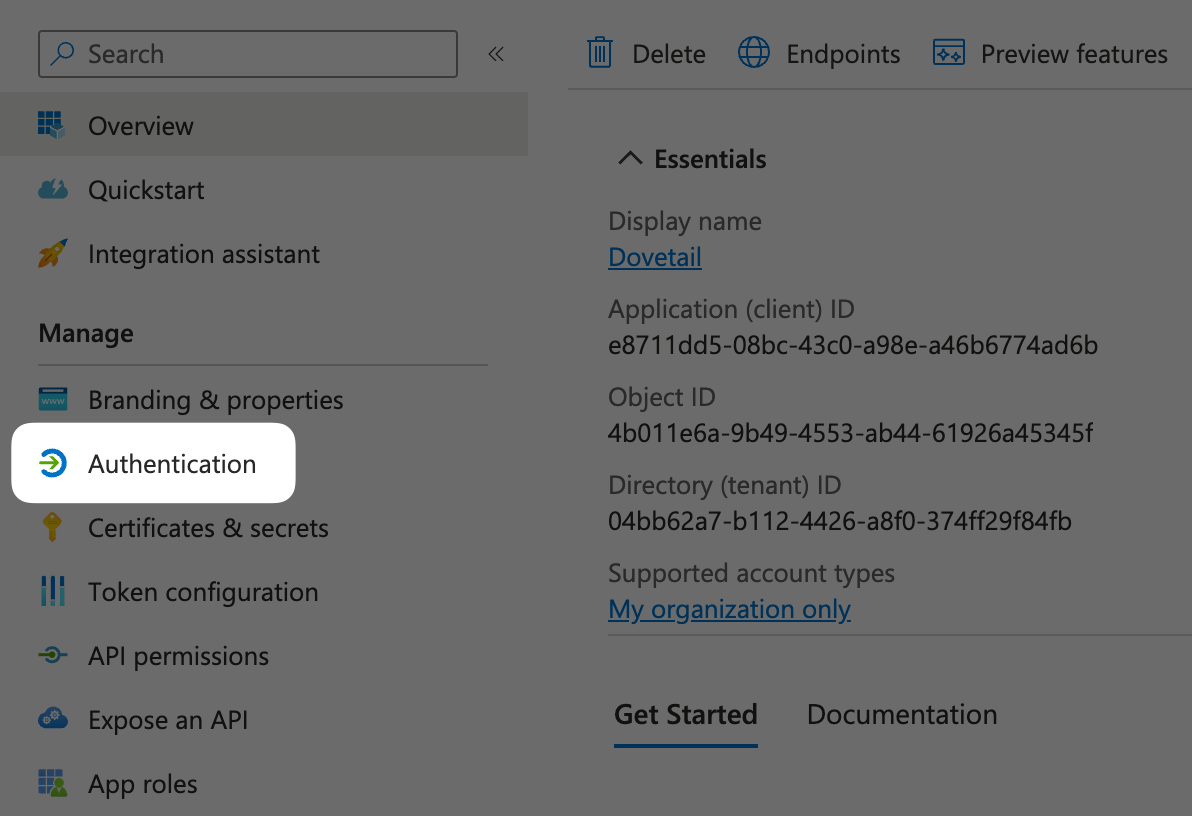
Copy the following IDs as they will need to be inserted later into Dovetail.
Application (client) ID
Directory (tenant) ID
![]()
Under Manage click Authentication.
![]()
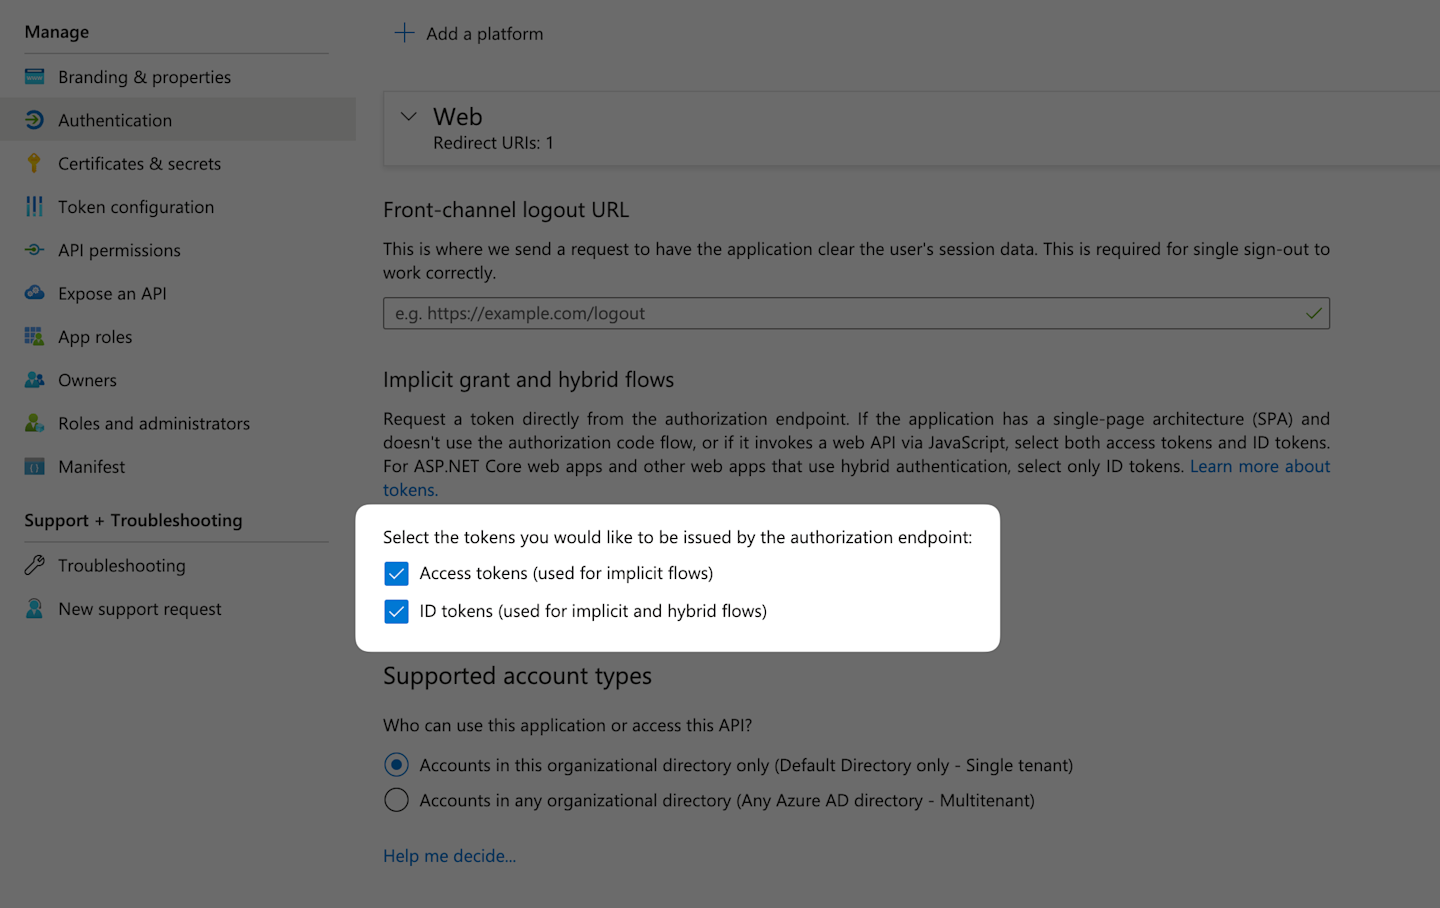
Tick both boxes under Select the tokens you would like to be issued by the authorization endpoint.
![]()
Click Save.
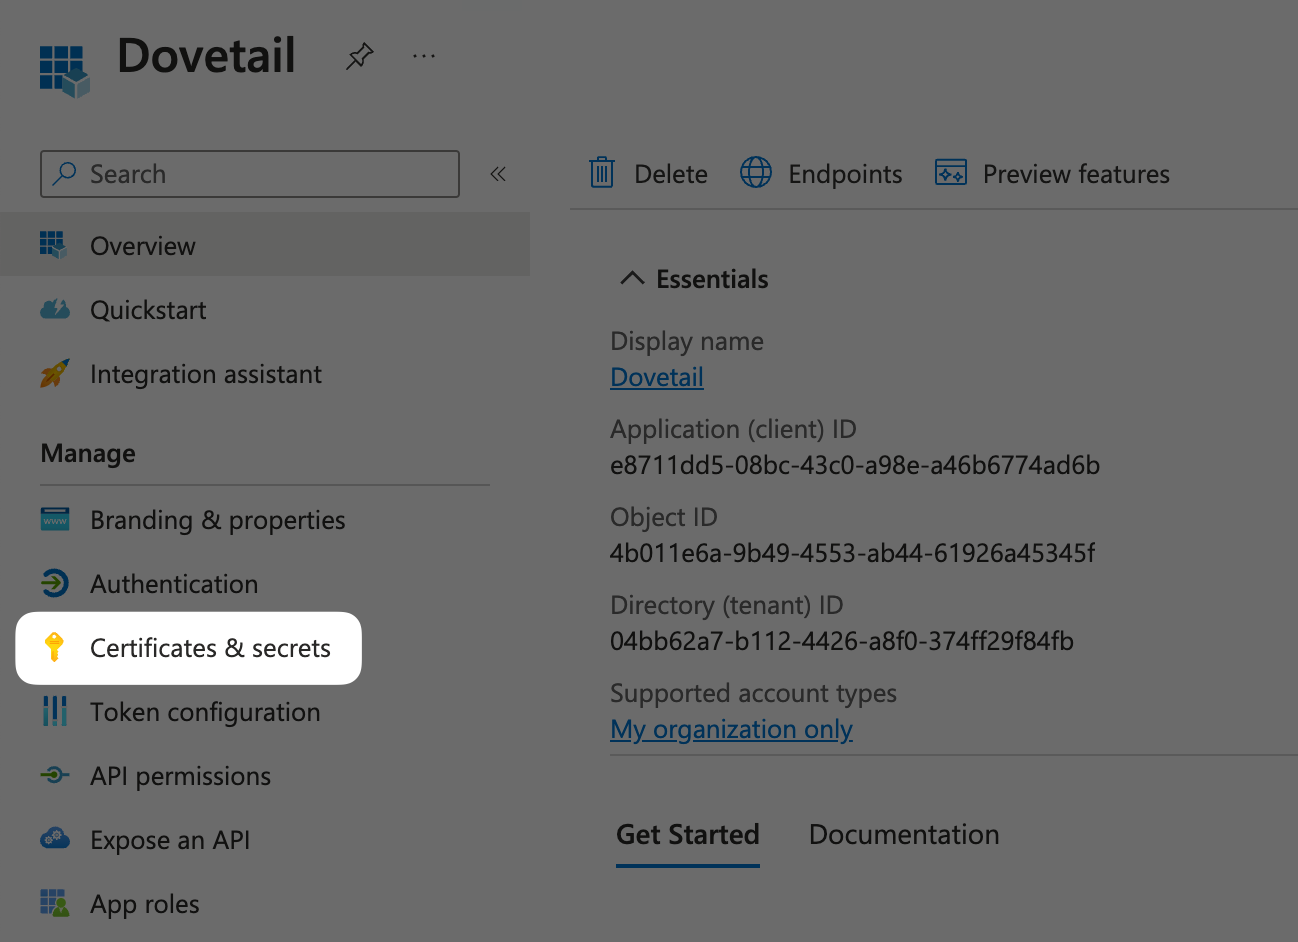
Under Manage click Certificates & secrets.
![]()
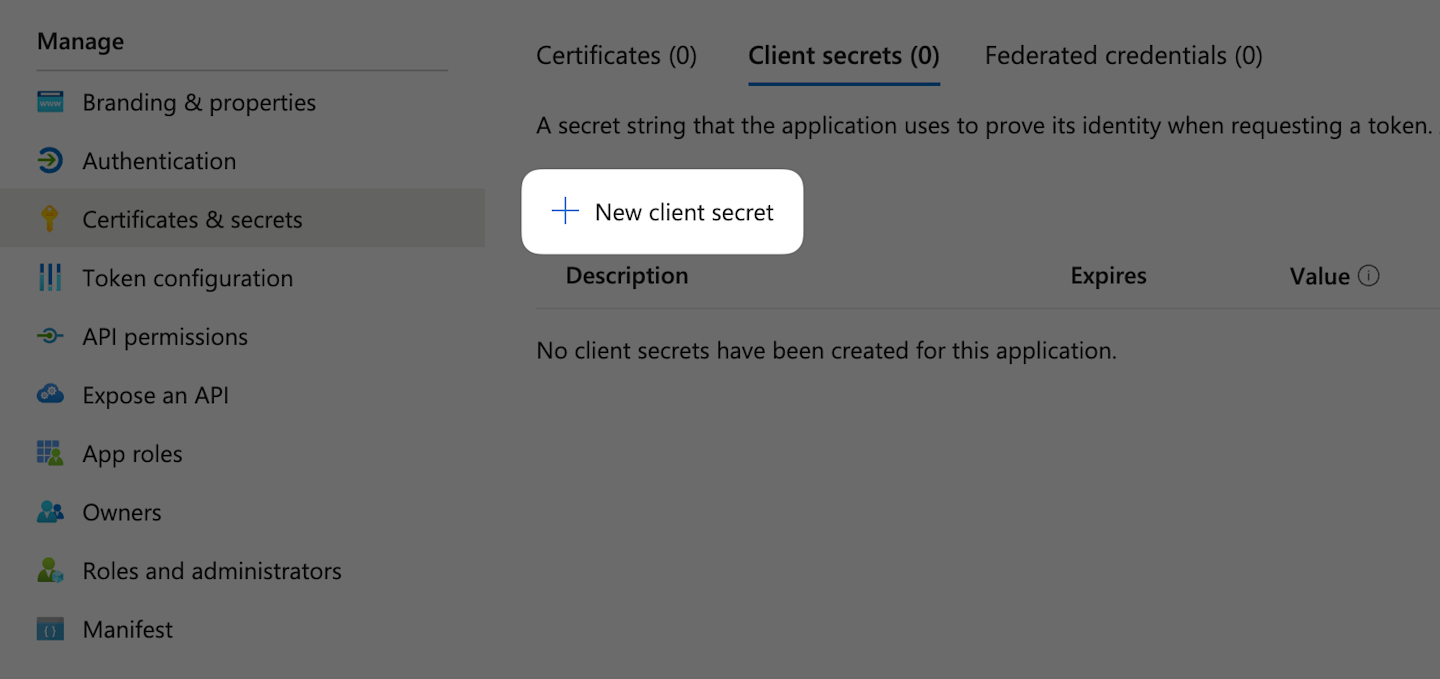
Under Client secrets click New client secret.
![]()
Enter a description and set an expiration date for your client secret.
Important
Please note that Dovetail SSO will stop working if you don’t create a new secret before the old one expires.
Copy the generated client secret under Value as this will need to be inserted later into Dovetail.
![]()
Please note
Client secret values cannot be viewed, except for immediately after creation. Be sure to save the secret before leaving the page.
Add values to Dovetail
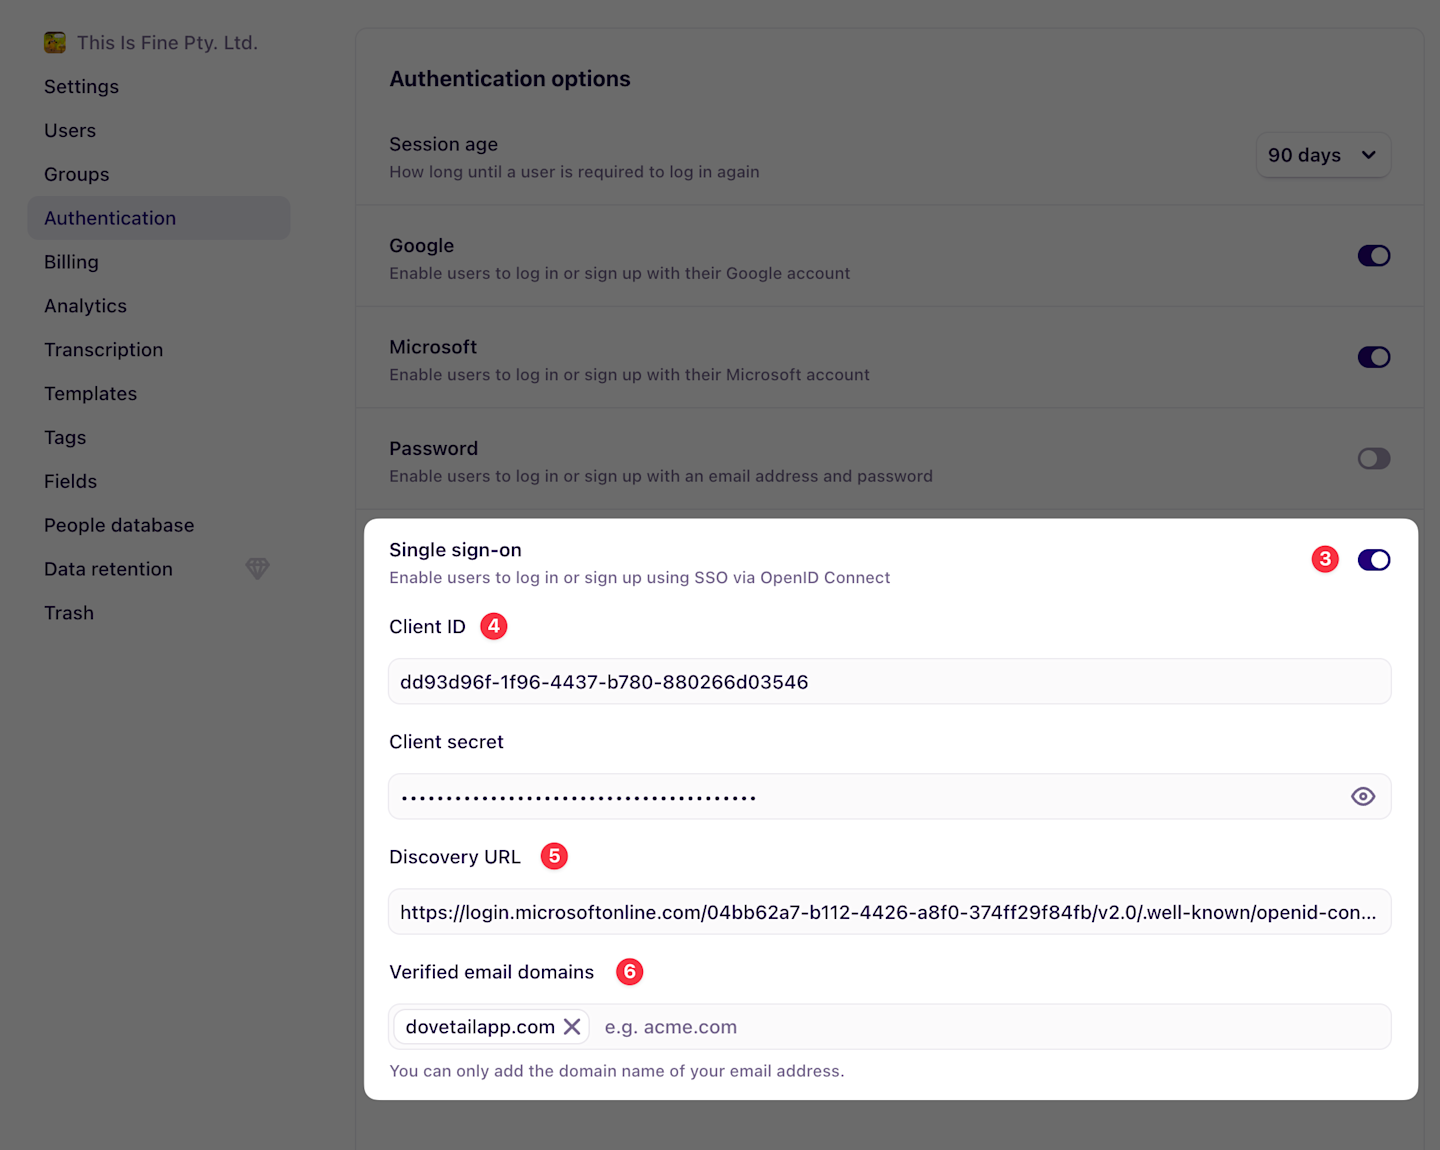
Navigate to the authentication page in workspace settings.
Find the Authentication options card.
Enable Single sign-on by clicking the toggle switch.
Using the IDs and client secret that we copied earlier,
Enter the Application (client) ID as the Client ID.
Enter the Secret value as the Client secret.
In the Discovery URL input, enter
https://login.microsoftonline.com/TENANT/v2.0/.well-known/openid-configurationreplacing TENANT with the Directory (tenant) ID that we copied earlier.Enter your email domain under Verified email domains.
![]()
Basic troubleshooting
Below you will find some general errors that you or your users may see when trying to log in with Azure AD.
If your error does not match any of the following, please reach out to us through this contact form and we'll be able to help out!
Email not verified
This error is generally caused if your domain has not been added as a verified email domain. To resolve this, a workspace admin will need to enter it by:
Navigating to the authentication page in workspace settings.
Finding the Authentication options card.
Entering your email domain under Verified email domains.
Please note
You can only add the domain name of your current email address. If you wish to add a different email domain, it will need to be done by another admin with that email domain.
Invalid authentication details
This error appears when Dovetail cannot validate specific user data provided by Azure. Most commonly, when there is no email assigned to the user in your Azure Active Directory.
To resolve this, your Azure Active Directory admin will need to:
Navigate to the Users section of your directory and select the user with the missing email.
Select Edit properties.
Navigate to Contact information.
Enter the user's email and press Save.
Give us feedback
Was this article useful?
Last updated 23 January 2025
